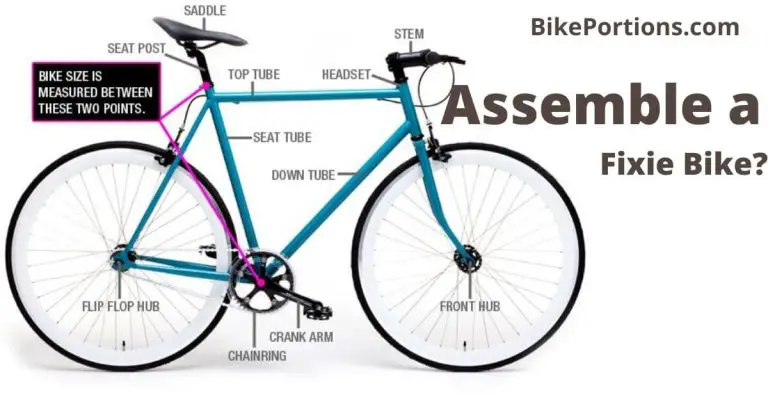
How to Make Fixie Bike at Home?
In this how to make a fixie bike at home guide, you will learn how to make your very own fixed bike. we want to give you proper guide on this. So please don’t skip anything. Read this guide thoroughly. Hope you understand well.
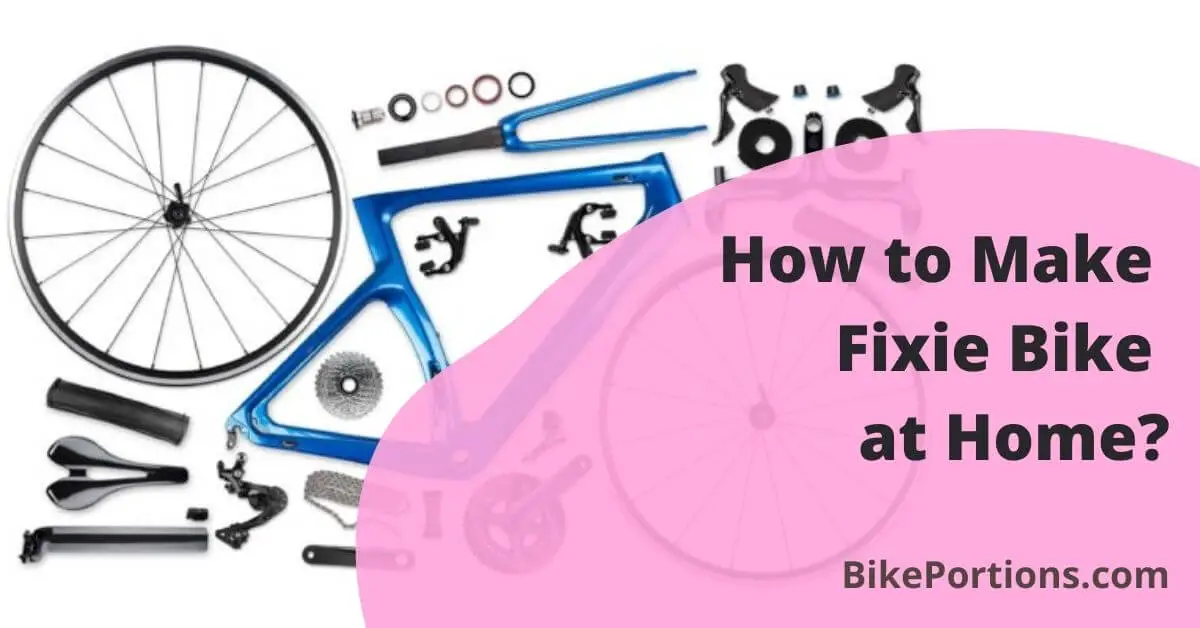
The first thing you must do is gather all the tools and materials required for the project. You will need:
Contents
Materials needed for making a fixie bike at home
– A bicycle frame
– A pair of wheels (without a freewheel) that fit into the frame.
– A handlebar and a stem for the handlebar.
– One or more brake levers, one or more calipers, and a brake cable
– At least one sprocket with a lock-ring
– Enough chain to fit around your rear cog and your front sprocket. However, if you have two cogs in the rear, you will need to double the length of your chain.
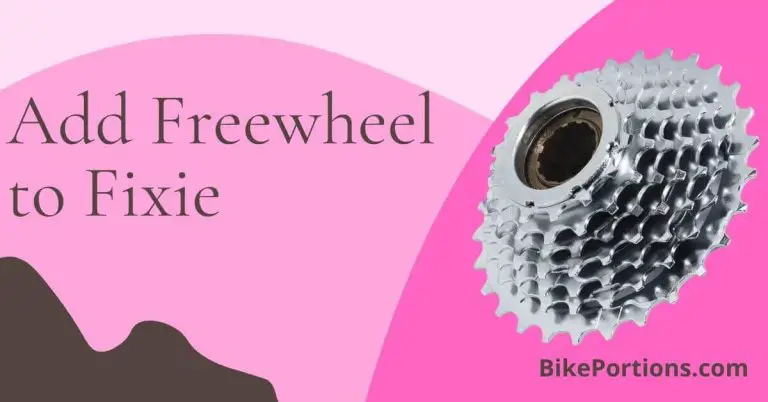
– A sprocket with a lock-ring (7 speed cassette or freewheel)
– Two nuts and bolts that fit around the bottom bracket shell, which are long enough to go through the pedal hole on one side of the bottom bracket, as well as through two or three layers of the material you’re using to pad the bottom bracket.
– Two nuts and bolts that fit around your rear axle, which are long enough to attach at least two layers of material to.
– A square head screwdriver
– A flathead screwdriver
– Two adjustable wrenches (optional)
You will also need the tools to install your new components. These include:
– A tape measure
– A ruler or straight edge, if you have it
– A 1/8″ bit drill for drilling the pedal holes in the bottom shell material pads, as well as whatever bit is required to tap the threads into the bottom bracket shell.
– A wrench that fits into your bottom bracket shell, to tighten the bottom brackets after installing it.
– An adjustable wrench capable of tightening nuts and bolts around a 1″ diameter bar or shaft. This will be used for the handlebar stem, as well as attaching the brake levers, calipers, and brake cable. You may also need another one to hold the nut inside the adjustable wrench so that you can tighten it.
– A file or belt sander to remove excess material from your brake levers, calipers, and handlebar stem so they fit correctly.
– Metal cutting blade with Hacksaw
– Sandpaper, if you’re using wood for the bottom bracket shell
– A rotary tool with a metal bit for removing excess material from your brake levers, calipers, and handlebar stem.
Steps required in the process of make a fixie bike at home
Remove the Pedal
You need to remove the pedals of your bike before you start making any changes to it. At this point there are two ways you can go about doing this:
Either drill some holes in the center of your pedals and thread bolts through them, or you can use a pedal wrench. Using the pedal wrench is easier if they’re cotter less. If they aren’t, it will be harder to attach them to your crank arms without first taking off the nuts and ball bearings with a crescent wrench.
Another option available to you is using a large screwdriver to take them off, provided they have a star-shaped hole for a wrench.
This how to make a fixie bike at home guide will not go in depth on how to install the bottom bracket. But it’s important that you know how to do so before you finish this how to make a fixie bike at home guide.
Install Bottom Bracket to Make Fixie Bike at Home
You will need to either install your bottom bracket by threading it, or press it in (for most bike frames). If you go with the first option, make sure you tap the threads into the frame before installing it. This how to make a fixie bike at home guide assumes that you are using sealed cartridge bearings for this. If you are not, your bottom bracket shell may need to be faced. It also assumes that you will use standard-width road bicycle cranks (130 BCD).
If you choose to use another type of crank, on this how to make a fixie bike at home guide we won’t cover how to install it.
Before you continue this how to make a fixie bike at home, ensure that your bottom bracket is installed correctly and the bearings spin smoothly with little or no resistance. If they do not, you will need to take it out and reinstall it until it does. Once you have tested your bottom bracket, you can get on with this make a fixie bike at home guide.
Attach your Brake Levers and Calipers
Now that you have your bottom bracket ready, it’s time to install the rest of the components. You need to attach your brake levers and calipers before attaching anything else. Because they need to go in a specific spot in order for the brake cable to be in a good location.
If you do not have brakes, or if your levers and calipers are already installed, you can attach them at any time. Find their spots on your handlebars and tighten them down with your adjustable wrenches.
At this point, we assume that you will use a standard road bike rim and tire. If not, then this make a fixie bike at home does not cover how to attach tires with different rims or how to change the tire on your existing rim. We cover it on next article.
When attaching the brake levers and calipers, it’s important that you leave enough room for the brake cable so that it won’t be pinched when you tighten them down. If your brakes have a quick release mechanism, we suggest you taking off the nut before attaching the calipers and levers. When tightening down your brake levers, we strongly advise against overtightening the bolts that attach them to your handlebars.
Doing this could cause damage the threads, making it impossible for you to remove the bolts.
Attach Handlebars to Make Fixie Bike at Home
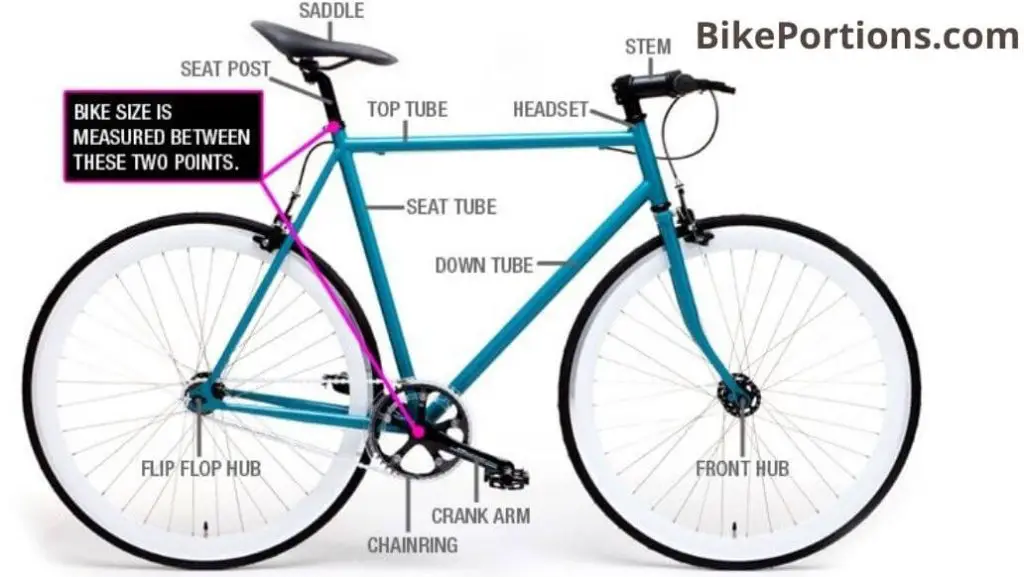
Now that your brake levers are attached, we suggest attaching your handlebars and stem. We assume that you will use standard-width road with 31.8 mm clamping diameter. If you have another size, we won’t cover how to do this step.
Before installing the handlebars stem, you need remove handlebar. When we suggest using your adjustable wrenches, but if you don’t have that, then you also use your hands.
Since we usually have plastic on them, we suggest wearing some protective gear.
Now that you have your brake levers, calipers, handlebars, stem, and you can attach them. While attaching your handlebars, stem, brake levers, and calipers, it’s important that you leave enough room for the brake cable so that it won’t be pinched when you tighten down.
We assume that you will use standard-width road brake cable and housing. If not, this how to make a fixie bike at home guide does not cover how to attach brakes with different housing. That’s all, You can now ride your fixie.
We have covered everything that is needed in to make fixie bike at home. Hope you understand and make the best practice.
Read More Here: Are Fixie Bikes Good for Exercise?
Benefits of Riding a Fixed Gear Bikes vs Other Types of Bikes
So far we have learned how to make fixie bike at home. Now let’s get some advantages of fixie bike. Hope you are a fixie lover.
Fixie makes you stronger
There’s no bailout gear on a fixie. If you want to get up a steep hill fixed will force you to work harder at times. Than you would on a geared bike and you’ll get stronger and fitter.
Fixed Feels Unique
The experience of being tied to your wheels is uniquely amusing. Fixies are not spiritually enlightening, but they do provide a very pure ride. According to some claims, riding fixed can even make your pedal strokes smoother. It’s the opposite we’ve found – we’re very skeptical about that. Despite the fact that you have to keep turning your legs, the feeling of momentum one gets is very pleasant. Your pedaling seems to never stop.
Can Learn New Things
If you want to write down a big hill, you have to keep going. Coasting is not an option. You can easily reach 200 rpm and a steep ascent can have you grinding down into the 20s. Brake lists are dumb and illegal, and we don’t endorse them. A fixie, however, has the advantage of letting you modulate your speed more easily with a bit of leg control. It’s important to adjust your cornering style – too much leaning over is likely to lead to pedal strikes.
Tough, Pretty & Simple
Fixies are perfect for riders who hate maintaining their bikes. While there are still gear cables to clean and doraleous to adjust. There are no vulnerable hangers for bending on bike racks. The simplicity of a fixed gear drivetrain can make for truly beautiful bicycles. And many of them are economical to maintain – there are not many parts to wear out. So they’re great for commuting in winter and for winter riding in general.
Fun to Ride
Riding fixie is quite a lot of fun some days. Gears are good, freewheeling is great, but we love variety and fixie’s novelty hasn’t worn off yet. While you probably shouldn’t use one as your only bike, if you are having trouble making things work with your cycling relationship and need a little spice, hop onto a fixie and take pleasure in pedaling everywhere all the time.
Some Disadvantages to Owning and Riding Fixed Gear Bikes
Here we are sharing some disadvantages also for riding fixie bikes. There are lot more, but we are writing some of them.
Can’t coast on fixie
the main draw of a fixed gear bike is that you can’t coast on it. If the wheels are turning you have to keep turning the cranks. And that lends itself to a very connected feeling with the bike. But for some people it’s just too weird of a feeling to ever get used to. Most people grow up riding bikes that have the ability to coast.
One Gear
A lot of fixed gear riders take pride in the fact. Because we only have one gear that forces us to become stronger riders if we want to go faster over different terrains. If you’re doing long rides especially if you’re doing a lot of climbing and a lot of people out there find riding a bike difficult enough as it is and that is a completely fair point most people who are going out to ride a 5000-foot mountain don’t need that ride to be longer and much more difficult at the end of the day.
Two Bare Bones
A lot of people also hate fixed gears because they’re two bare bones. bare bones making it a bit of a problem if you ever want to carry stuff on your bike instead of in a bag there. also tends to be limited geometries with super steep and aggressive c-tube and head tube angles and a short wheelbase to make the bike feel responsive when putting power through the pedals.
Final Thoughts for This Make Fixie Bike at Home Guide
You are at the last point. In this how to make fixie bike at home guide we tried to cover everything that you need to know. If you have any question regarding this. Feel free to comment. (Latest Updated).